Turn a Photo Into a Coloring Book: Simple Steps That Actually Work
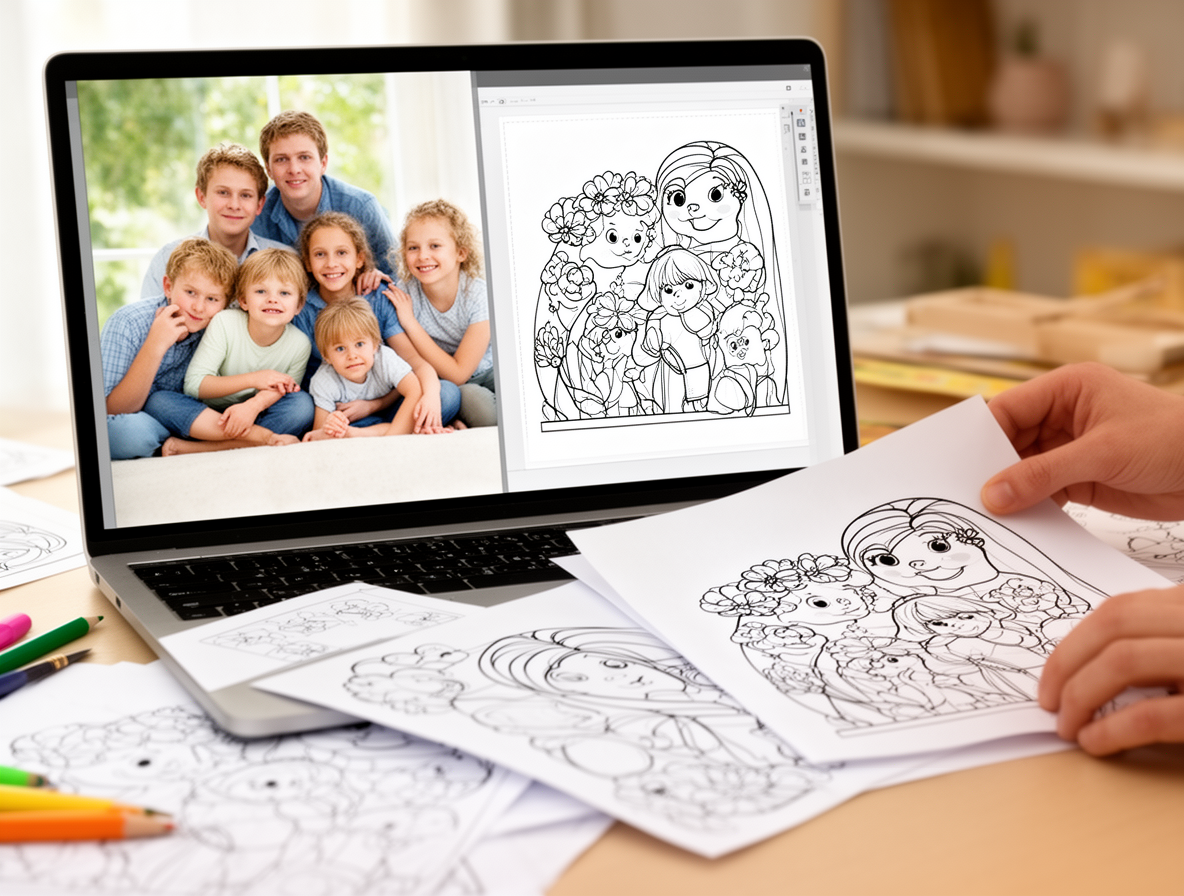
Yes, you can turn a photo into a coloring book. The easiest way is to start with clear, high-contrast photos, convert each image into clean line art one page at a time, and combine the best pages into a simple printable booklet. If you skip the photo selection step and use cluttered snapshots, the final pages usually come out muddy and frustrating to color.
The best photo-to-coloring-book pages usually have one clear subject, simple lighting, and a clean background. That matters more than the tool name. A good photo plus a decent converter almost always beats a great tool fed a messy image.
⭐ Why this matters: If you want to test one image before building a full booklet, you can try the DaVinci in You upload-and-transform tool and generate a coloring page from a family photo first. Once you like the result, you can print more pages or turn the best one into a gift.
🖼️ Start with the right kind of photo
Not every photo should become a coloring book page. The cleanest pages usually come from portraits, pet photos, or one simple family moment with strong contrast. Wide group shots, dark rooms, and busy backgrounds tend to create thin, confusing outlines.
Good photo choices for a coloring book:
- one child, one pet, or one main subject
- clear edges around faces, hair, clothes, or objects
- daylight or even indoor lighting
- simple backgrounds that will not fight the outline
- close or medium crops instead of far-away full-room scenes
Bad photo choices:
- tiny faces in a large landscape shot
- harsh shadows across eyes or mouths
- three or more people overlapping each other
- heavy filters that already flatten details
- busy toys, furniture, or patterned wallpaper behind the subject
💡 Pro tip: Crop tighter before you convert. A close-up of the best part of the photo usually makes a better coloring page than trying to preserve the whole original frame.
📘 Pick the fastest route for your coloring book pages
Most people do not need a complicated design workflow. If your goal is a simple coloring book for kids or grandparents, the fastest route is usually to convert one photo at a time, print a test page, and keep only the versions with clear outlines.
| Method | Best for | Main tradeoff |
|---|---|---|
| One-click converter | Fast printable pages from family photos | Less control over line cleanup |
| Manual editor | Tweaking contrast, removing background clutter | Takes longer page by page |
| DaVinci in You upload & transform | Testing pages, then turning the best one into a keepsake gift | Best fit when you want both the page and a finished product path |
A simple workflow that actually works:
- Pick 5-12 strong photos. Start smaller than you think. A short coloring book with clean pages is better than a long one with weak filler.
- Convert each photo separately. Do not batch everything and hope it all works. Some photos will translate beautifully, others will not.
- Print one test page first. What looks good on a screen can still be too gray or too detailed on paper.
- Standardize the layout. Keep margins, page size, and line weight consistent so the finished book feels intentional.
- Assemble the final set. Stapled pages, a simple binder, or a PDF is enough. It does not need to be fancy to feel personal.
If you are still deciding which converter style works best, our guide to photo to coloring page converters breaks down what to watch for. For a more practical page-quality walkthrough, see how to turn any photo into a coloring page.
⚠️ Heads up: Background clutter is the fastest way to ruin a page. If a photo has toys, furniture, plants, and patterned clothes all fighting for attention, simplify it before you convert it.
🎁 Turn the best page into a real keepsake
This is where a photo coloring book gets more interesting than a one-off printable. Once you have one page that really works, you can do more than bind it into a booklet. You can print that page onto something a child can color and keep.
DaVinci in You gives you three ways to create: text-to-image AI, upload & print, and upload & transform. For this workflow, upload & transform is the useful one because it lets you start from a real photo and turn it into coloring-page-style artwork.
If you want the fastest next step, start with the free page test. Signed-up users get 32 free credits per day, guests get 4 free credits per day, and you can use that to see whether a photo is worth turning into a full book or gift.
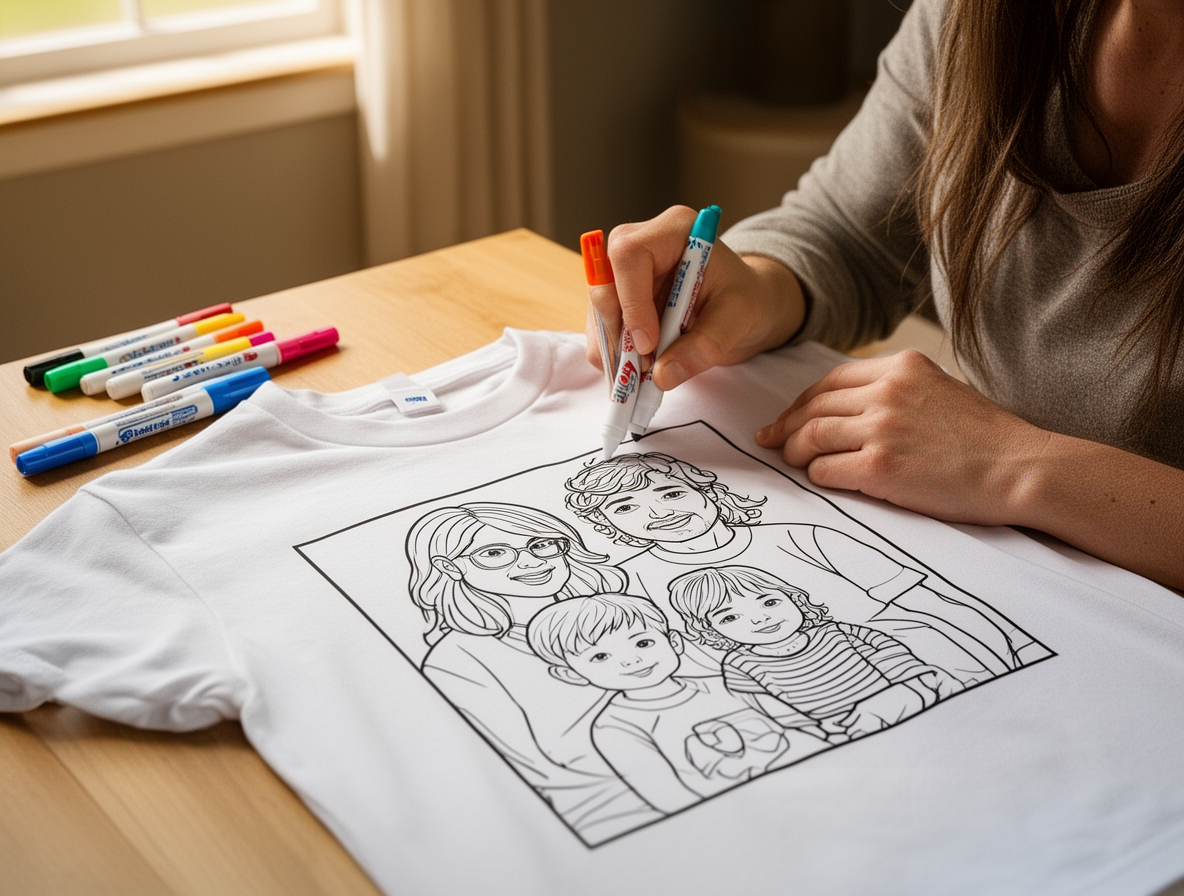
When you are ready to make it giftable, the best fits are usually a kids T-shirt coloring kit, an adult sweatshirt coloring kit, or a blanket coloring kit. Coloring kits include 10 fabric markers, kids shirts are best for ages 4+, and shipping is usually about 5 business days.
💡 Pro tip: If the plan is to wash the finished shirt or blanket, color it first and iron the design after coloring. That helps the fabric marker ink stay in the fabric through washing.
Want the finished-product route? Start here: design a personalized gift from your best page. If you want the washable-marker details before you buy, read our guide on marker and clothing cleanup.
🛠️ Common mistakes that make photo coloring books look disappointing
Most bad results come from a few repeat mistakes. The good news is that they are easy to avoid once you know what to look for.
- Using low-resolution screenshots. Start with the original photo whenever possible.
- Trying to keep every background detail. Simple pages color better and print cleaner.
- Skipping the test print. Thin gray lines often look fine on screen and disappear on paper.
- Mixing page styles. If half the book is bold line art and half is sketchy shading, the final book feels random.
- Building too many pages at once. Ten good pages beat twenty uneven ones every time.
If your goal is a gift, not just a printable, think about the “best single page” first. The strongest page often becomes the cover of the mini book, the favorite page in the set, and the one worth turning into a shirt or blanket later.
Frequently Asked Questions
Can you really turn a photo into a coloring book?
Yes. The practical way to do it is one page at a time: pick strong photos, convert each image into clean outlines, test print the best versions, and combine them into a short booklet.
What kind of photo works best for a coloring book page?
Photos with one clear subject, even lighting, and a simple background work best. Close-up portraits, pet photos, and simple family moments usually convert much better than wide or cluttered scenes.
Is there a free way to turn a photo into a coloring page first?
Yes. You can test a photo first with DaVinci in You’s upload-and-transform flow and use the free daily credits to see whether the image turns into a clean page before you build a full booklet.
What should I do after I make the coloring book page?
Print a test page first. If it looks clean and fun to color, you can build a small booklet, or turn the best page into a keepsake on a shirt, sweatshirt, or blanket.
If you want to start simple, test one photo first. Then build the book. And if one page comes out especially well, turn it into a gift someone will actually keep.